Articles

So, how do you get super glue off your fingers and hands? Dropping super glue on fingers and other skin is not the end of the world, and can easily be cleaned off by following these simple steps.

Soak the affected area

If you do get super glue on your skin, the first thing to do is to soak the affected area in warm soapy water. If you act quickly, this may well be all that is needed in order to loosen the glue.

Consider adding vinegar to the soapy water. Its acidic properties will work against the agents of the glue.

                  Try an acetone-based nail polish remover

If the glue remains, an acetone-based nail polish remover should do the trick. Make sure it contains acetone, as this is needed in order to be effective. Dab the acetone gently into the glue until it is loosened and comes off.

Do not apply the acetone using any cotton-based material, like a cotton ball or cotton pad as this could become caught in the superglue.

File the glue away

If a small amount remains, gently use an emery board as a file to remove super glue from your skin. This is of course a tricky task, which needs to be done carefully to avoid damaging the skin.

If you find this tricky, ask someone to help you.

                  Use margarine if you have sensitive skin

A milder alternative, if you have sensitive skin and are concerned about the effects of the acetone, is to use margarine. Gently rub the margarine into the affected area until the glue comes away.

Make a salt and water paste

Another alternative to acetone (although less advisable if you have any cuts or damaged skin close by) is to add salt to a small amount of water to make a paste, and apply it to the affected area. Rub it in, rinse it away, and repeat the process if the glue lingers. If the glue is sticking two fingers together, rub the paste between the fingers until they gently come apart.

Use lemon juice for stubborn superglue

If you’ve followed our guide for how to get super glue off your hand put the glue is proving stubborn, try the method above using lemon juice rather than water. The acidic agents in lemon juice will work on the glue at the same time as the abrasive properties of the salt.

This method isn’t advisable if you have any cuts or damaged skin close by.


Sometimes a little bleach is all you need to remove stains from caulk. If, however, the caulk around your tub is in a permanent state of funky discoloration, it’s time to remove and replace it. The same is true if the caulk is starting to lift and peel away from the surface. The caulk removal process is the same no matter what type of caulk you’re removing or what you intend to replace the old caulk with. There’s no magical removal method. All you can do is apply a chemical softener and then carefully dig the old caulk out of its groove.


Soften It Up

Before asking your spouse or a friend for a massive favor, you may try to soften them up a bit first. Take the same approach with old caulk. Sweet talk won’t work on caulk, but a bit of chemical persuasion will. Hardware and home improvement stores almost universally carry chemical solvents called caulk removers. While not strictly necessary, using a caulk removal product to soften the old caulk will make your life much easier. To do so, cover the old caulk with a bead of caulk remover and allow it to sit overnight. Close the bathroom door to keep curious pets and children away from the solvent while it works. Caulk removers work on all types of caulk, including silicone, acrylic and vinyl, so you don’t need to know what kind of caulk you’re removing to make use of them. They can harm plastic, however, so read the directions carefully and know what your tub or sink surround is made of.


Pull It Out

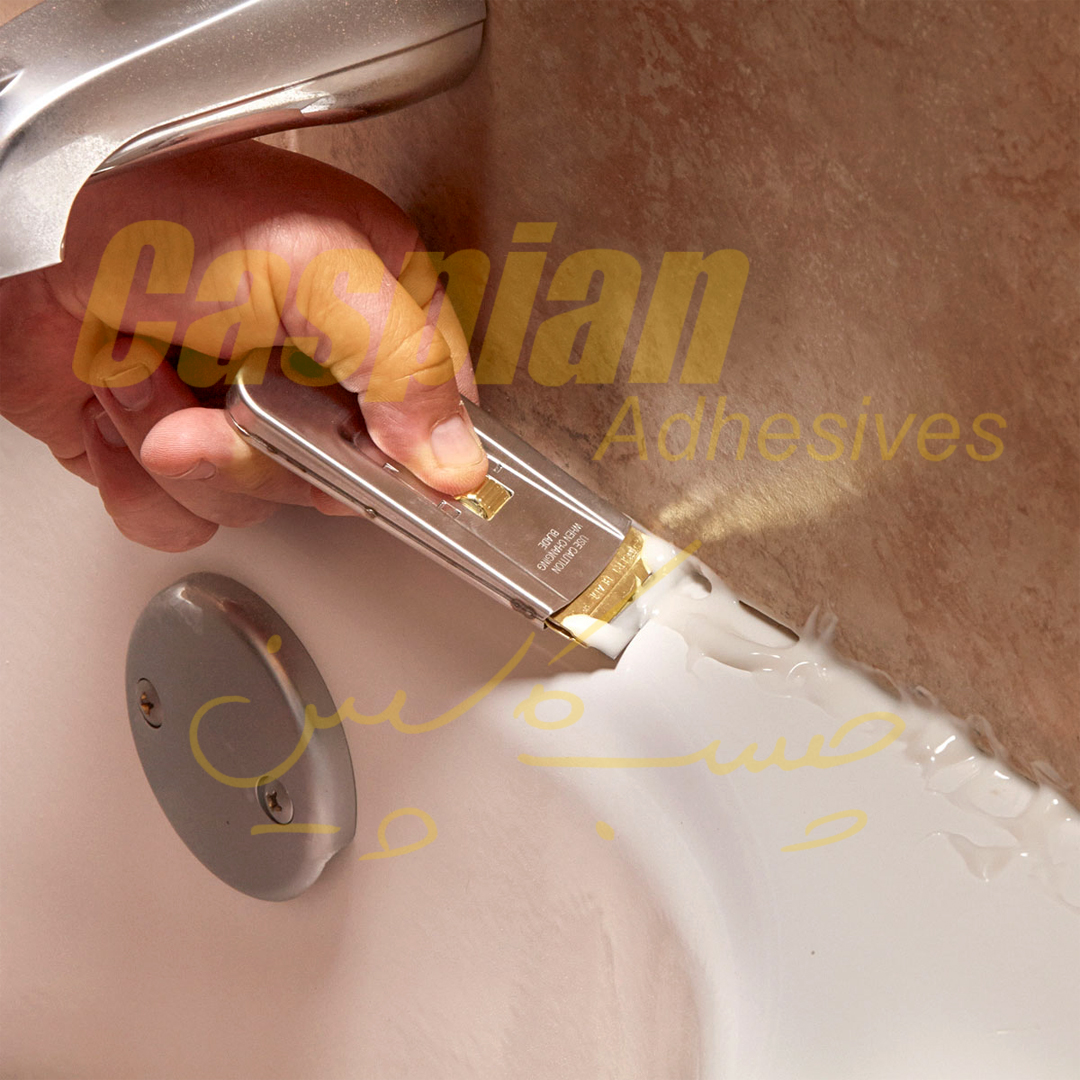
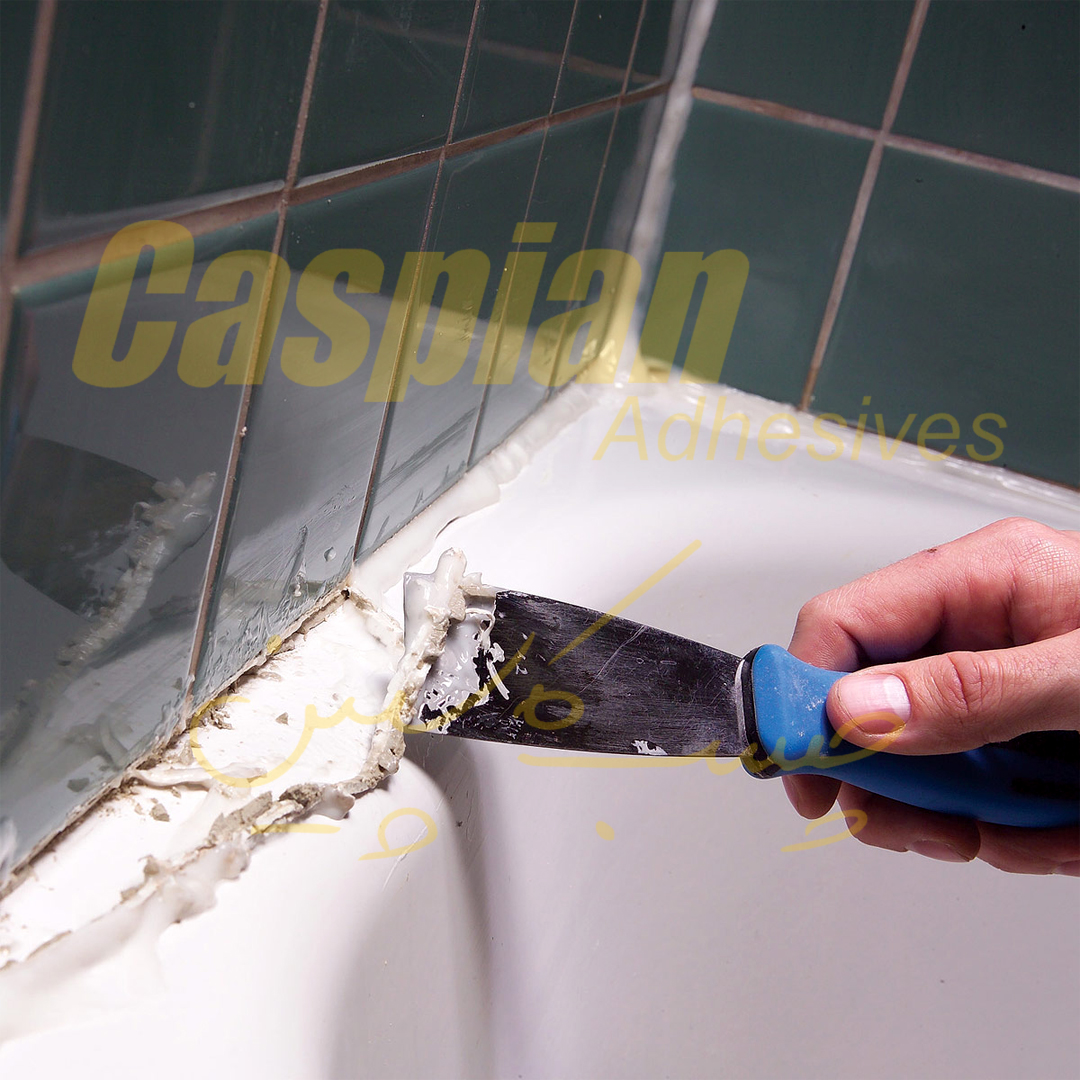
Once the old caulk has softened, simply pull it off the tile or wall. You’ll need a caulk removal tool, putty knife, utility knife or the hook end of a painter’s 5-in-1 tool to get into the crack and start working the caulk free. If the caulk is several layers thick, a pair of needle-nose pliers may give you the best grip. The goal is to lift the edge of the caulk and slowly pull it out in one strip if possible. The old caulk may stretch or crumble, depending on its age and composition. Tougher jobs may require you to break the caulk free by cutting into it. Whatever tool you use to do this, move slowly, carefully and patiently. One slip could mean damaging the tub, tile or bath surround. After pulling out the bulk of the caulk, scrape away the remnants with the utility knife or painter’s tool. Once again, exercise caution and patience to avoid causing any damage. Caulk removal isn’t a difficult job, but it’s also not a glamorous or speedy one. Take a break if you start to get frustrated or feel impatient.


Clean the Area

After removing the old caulk, you’ll need to clean the surface and kill any mold or mildew before re-caulking. Use soap scum remover and warm water to give the area a general cleaning. Next, add 1/3 cup of bleach to a gallon of water to create a mildew-killing solution. Use a chiseled foam brush to work the bleach mixture into the gap where the caulk was. Then scrub the surface with a damp cloth, rinse and dry with a clean cloth. You’re now ready to apply a fresh bead of new caulk to the surface.


SOURCE

It happens to everyone, even professionals — you finish a project, and after applying the stain, an ugly blotch appears where a smear of glue sealed the wood away from your stain. You didn’t see it before, and now it’s there, in all it’s whitish glory. Glue gets everywhere. It squeezes out of joints, gets on fingers and mars the wood. Don’t be too hard on yourself. Use one of several solutions to remove the dried glue.


Drips and Drops

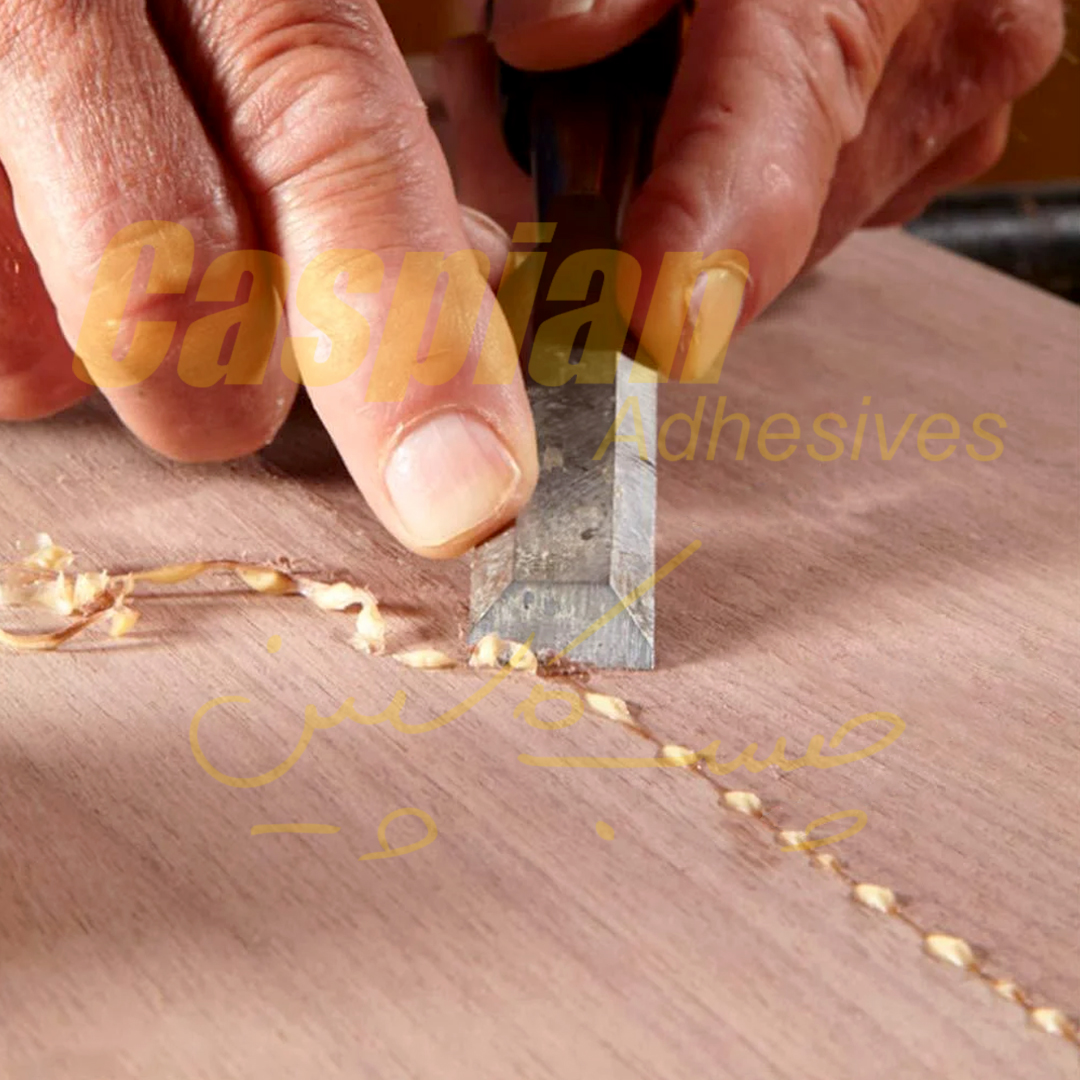
Dried wood glue is hard as rock. Fortunately that same hardness makes it easy to chip off with a sharp chisel.


Step 1: Get a Sharp Chisel

Place the tip of a sharp chisel at the base of the drip or gob of glue. The beveled side of the chisel should be facing up.


Step 2: Rock the Chisel

Hold the chisel at a 15-degree angle. Rock the chisel back and forth as you gently push it forward to get under the glue.


Step 3: Tap on It

Tap on the end of the chisel with a small mallet or other light object if the glue resists your efforts. When the glue chips off, lightly scrape the area with the sharp edge of the chisel to remove excess fibers that might have pulled loose.


Glue Smears

Glue smears are typically caused by fingers. Smears can’t typically be removed with a chisel, because the glue gets into the pores of the wood. Glue smears are common, and the only real solution is to sand them off. But before sanding, it’s sometimes possible to remove a smear by softening it with acetone.


Soften A Smear


Step 1: Tape it Off

Place strips of masking tape around the perimeter of the smear.


Step 2: Apply Acetone

Wet the smear with a cotton swab dampened with acetone. Acetone evaporates rapidly. Keep the smear wet for about 15 minutes.


Step 3: Scrape and Rub

Use the chisel to gently scrape off the softened glue. If it doesn’t do the job sufficiently, scrub the smear off with medium-grit steel wool.


Sand it Off

Even the best efforts with acetone might not remove a smear. If this is the case, sanding it off is the only option.


Step 1: Fold Sandpaper

Tear a piece of 100-grit sandpaper in half, and then tear one of the halves in half. Fold the quarter-sheet of sandpaper into a 1/2-inch-wide piece.


Step 2: Use Your Finger

Fold the strip of folded sandpaper around your finger. Scrub the sandpapered finger over the smear with a back-and-forth motion until the smear is gone.


Step 3: Switch to a Block

Attach 100-grit sandpaper to a sanding block if the smear removal left a white spot on the wood. Sand the area lightly to blend the spot, fading the white area into the stained area if needed. Reapply stain as needed to the sanded area.


Preventative Measures


Wet Glue

If you see wet glue anywhere on your project, wipe it off immediately with a damp cloth. Water is fine or use acetone for a stronger solution. If it’s a large gob or drip, wait about 15 minutes for the glue to dry slightly, and then scrape it off with the chisel. Waiting works better for larger glue spots because it doesn’t smear them.


Use Masking Tape

Tape off joints, cracks and other areas when you’re applying glue. The tape focuses the glue to go where you need it, without smearing, and it also prevents glue from squeezing out when you add clamps.


Clothing and Fabric

If you’ve got glue on your hands, it’s a sure bet it’s on your clothing as well. Unfortunately, wood glue is extremely hard to remove from fabric. If you notice it while it’s still wet, immediately wash it off with water. If you see it after it’s dry don’t wash it. Heat sets glue into clothing permanently. A solution of acetone, water and vinegar may soften the glue enough to scrape the majority of it off.


SOURCE

If the caulk around your bathtub is cracking, old, or just in need of an update, applying new caulk yourself is easy to do. with a few tools from your local hardware store. Remove the existing caulk first, before setting a smooth, new layer to seal the seams. This easy fix will leave your bathtub looking fresh and clean in no time! .


Part 1

Removing Existing Caulk


برداشتن درزگیر قدیمی

Get a razor scraper to remove the old, existing caulk.

This tool will cleanly remove existing caulk with a simple scraping motion. Make sure that the blade is plastic, as a metal blade can scratch and damage plastic bathtubs.

  • If you are installing a new bathtub, there won’t be any old caulk to remove! Skip this section and concentrate on applying new caulk.
  • A utility knife is another option for a quick removal of caulk. Ensure that the blade is plastic.
  • Although you can buy specialty caulk removers, these can damage plastic bathtubs. Fiberglass and acrylic tubs can also be easily scratched. Stick to plastic blades for these too.


برداشتن درزگیر قدیمی

Use sharp strokes to scrape away the old caulk.

Place the blade flush against the surface of the bathtub, and use small, quick strokes to scrape the caulk. This will remove the caulk from the surface cleanly.

  • This motion will cause the caulk to flake away in long, thin pieces.
  • Once you have gone around the bathtub removing old caulk, do a final check to find any spots you may have missed.
  • Use tweezers to pry out any hard to reach caulk.


برداشتن درزگیر قدیمی

Clean up the pieces of old caulk.

Wipe up and remove any pieces of caulk that you can see. Then vacuum the tub to remove any leftover, hidden pieces.


برداشتن درزگیر قدیمی

Wipe down the bathtub with denatured alcohol.

Use an old rag to wipe down all of the areas of the bathtub where caulk was with denatured alcohol. This will help to clean the surface in preparation to apply the new caulk.

  • If there are any particularly stubborn pieces of caulk that won’t come away, then you can also use denatured alcohol to help remove these. Soak a rag in denatured alcohol and leave it resting over the caulk for 2 days. Then it should easily scrape away.


برداشتن درزگیر قدیمی

Use a bleach solution to remove any mildew or mold.

Mix ⅓ cup (80 ml) of bleach with 1 gallon (3.79 L) of water. Wear gloves and make sure the room is well-ventilated. Then, use a stiff brush to scrub the bathtub and the edges where the caulk used to be with the solution.

  • Let this solution dry fully before applying the new caulk. Leaving it overnight and keeping it well-ventilated is best.
  • If you have mold on your existing caulk, chances are it’s coming from moisture behind the caulk. New caulk won’t make your bathtub waterproof, so if you have a leak behind the shower, you’ll still need to fix that.


Part 2

Adding New Caulk


زدن درزگیر جدید

Purchase caulk made for use in bathrooms that is formulated for the type of tub you have.

Hardware stores sell a variety of different types of caulk, so pick one that is for kitchens and bathrooms, or “tub and tile”. Caulk for bathtubs comes in either silicone or acrylic latex forms, and the best type to use depends on the material of your bathtub.

  • For fiberglass bathtubs, silicone caulk is usually the best to use. It comes in a limited color palette and is difficult to smooth, yet is very flexible.
  • For ceramic tubs, acrylic latex is recommended. It is easier to clean up that silicone and comes in many different colors, yet will need to be replaced slightly sooner than silicone caulk.


زدن درزگیر جدید

Lay down strips of painter’s tape to get clean edges.

Place strips of painter’s tape just above all of the edges where you will apply the caulk. Next place parallel strips just below where the caulk will be, leaving a thin gap between the 2 strips.

  • The gap in between these strips will be the width of the caulk.
  • Although it depends on your style of the bathtub and edging, the gap between the painter’s tape strips is normally around 0.375 inches (0.95 cm).


زدن درزگیر جدید

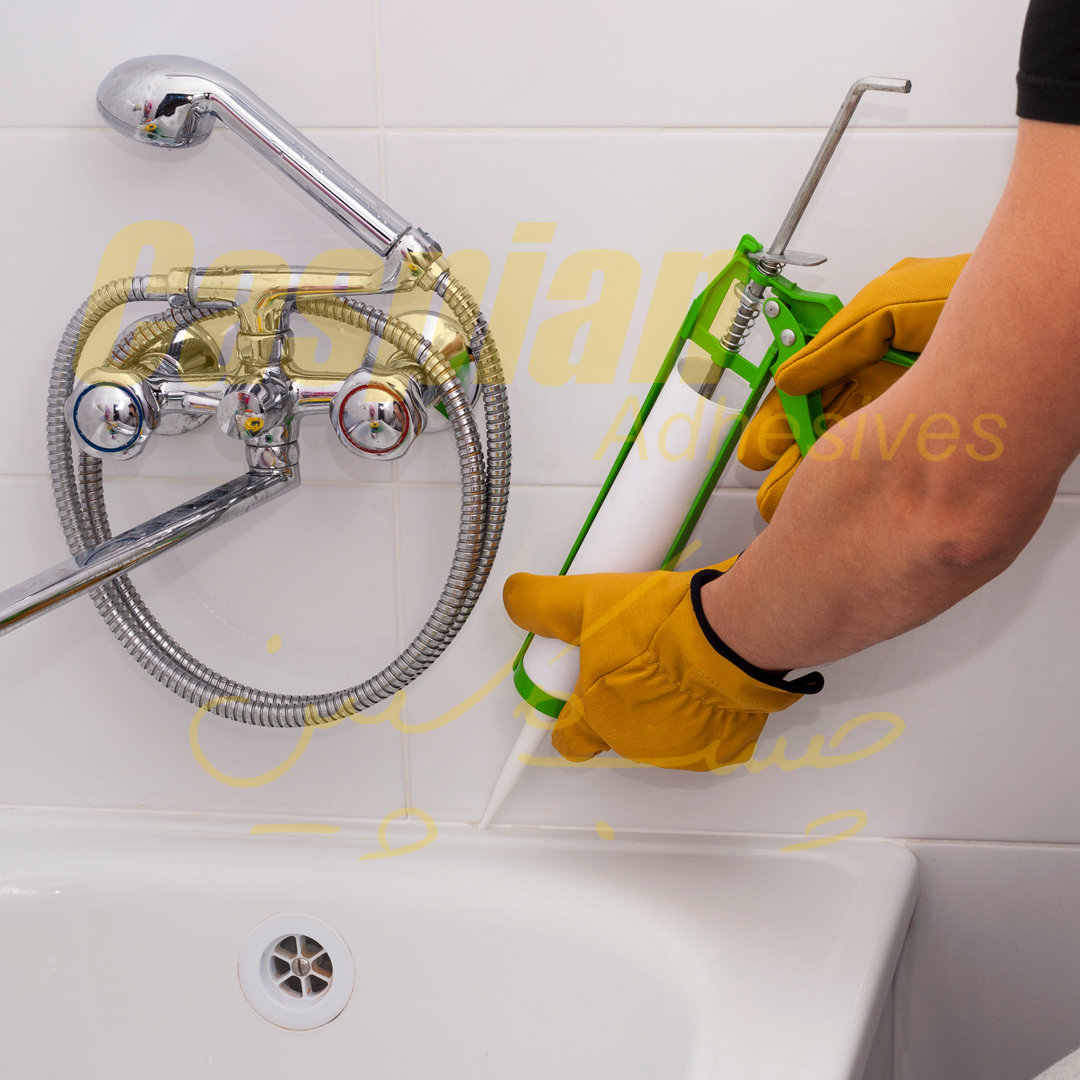
Load the application gun with the caulk tube.

Cut the tip off the caulk tube at a 45-degree angle. Push the stick on the application gun through the nozzle of the caulk tube to break the seal. Then place the caulk tube into the application gun, with the nozzle in the notched end of the gun.


زدن درزگیر جدید

Hold the application gun loaded with caulk at a 45-degree angle from the edging.

This means that the gun will be at an equal distance from either side of the corner where the caulk will go. The nozzle will be very close to the seam.


زدن درزگیر جدید

Apply the caulk to the seam.

Use a steady pressure on the application gun to carefully apply the caulk in the gap between the 2 strips of painter’s tape. Move the gun smoothly around the entire edge.

  • It doesn’t matter if caulk gets on the tape, as you can easily peel this off after.
  • Keep the application gun moving at a steady rate that matches the speed of the caulk leaving the nozzle. This will ensure that the caulk isn’t too thin or thick.
  • You can either pull the gun towards you or push it away from you as you apply the caulk. It works the same either way, so stick with what is comfortable.


زدن درزگیر جدید

Smooth the caulk to form a concave shape.

Dampen either a paper towel or a lint-free rag. Press it softly into the seam using your finger, and carefully run it along the caulk in one continuous line.

  • You can also use painter’s tape to press down the caulk. Just be sure to pull the tape away before the caulk gets tacky.


زدن درزگیر جدید

Remove the painter’s tape.

Peel away all of the strips of painter’s tape from around the bathtub. This will remove any excess caulk and create a nice, straight line along the seam.

  • Try and work as quickly as possible to remove the tape, as you also have to smooth the caulk again.
  • Be as careful as possible when removing the tape, and try not to let it touch the caulk seam.


زدن درزگیر جدید

Get rid of any small ridges left by the tape by smoothing the caulk again.

Use a damp paper towel or lint-free rag again to smooth over the caulk. This will ensure that the whole caulk edging is seamless.

  • Focus particularly on areas where 2 pieces of tape met, and these leave a small ridge.


زدن درزگیر جدید

Let the caulk dry for at least 48 hours before using the tub.

The specific amount of time that it will take for the caulk to dry will be listed on the instructions on the caulk tube. Keep the area well ventilated and dry as the caulk cures.

  • You will be able to tell when the caulk is dry because the consistency will change to look firm rather than wet, and it will be completely dry to touch.
  • If you use quick-curing caulk, it may be water-ready in as little as 30 minutes. Read the label carefully to be sure


SOURCE

Caulk can help keep water from seeping beneath the rim of your kitchen sink. Since it dries out and cracks over time, it needs to be replaced periodically to help keep the area it seals clean and dry.


Steps:


Make sure the rim of the sink is clean and dry.


Remove any old caulk from the rim with a utility knife.


Cut through the old caulk and pull it free from the rim.


Clean up the area with a paper towel soaked in rubbing alcohol to remove any old caulk residue and to ensure a clean surface ready to accept new caulk.


Let the sink’s rim and counter edge dry completely.


Apply painter’s tape to the counter next to the rim, leaving a thin gap for the caulk to be applied.

This will make clean up easier and ensure a straight, even caulk job.


Cut off the tip of the caulk tube with a utility knife.


Make the cut only as large as the opening around the sink to avoid having too much caulk come out at once.


Insert the tip of the caulk tube into a caulk gun and push the plunger of the gun up into the back.


Prime the tube by squeezing the trigger a few times until the caulk rises to the tip of the gun.


Place the tip of the gun against the edge of the sink’s rim where it meets the countertop.


Slowly squeeze the trigger to release a thin line of caulk around the edge of the rim.


Keep moving the gun as you squeeze the trigger, holding the tip of the gun tight up against the rim for a tight application.


Apply the caulk all the way around the rim of the sink from one end to the next.


Pull away the painter’s tape from the counter.


Wet your index finger and smooth the caulk against the edge of the rim and the counter.

This will provide a watertight seal. Press the caulk firmly against both edges of the rim and counter, sliding your finger as you go.


Re-wet your finger frequently to ensure it slides easily against the caulk.


Wet a paper towel with water.


Use the wet paper towel to wipe up any excess caulk or caulk that has strayed too far from the edge of the rim.


Let the caulk dry for at least 24 hours before using the sink and surrounding area to prevent it from getting wet too early.


Click to access the article source.

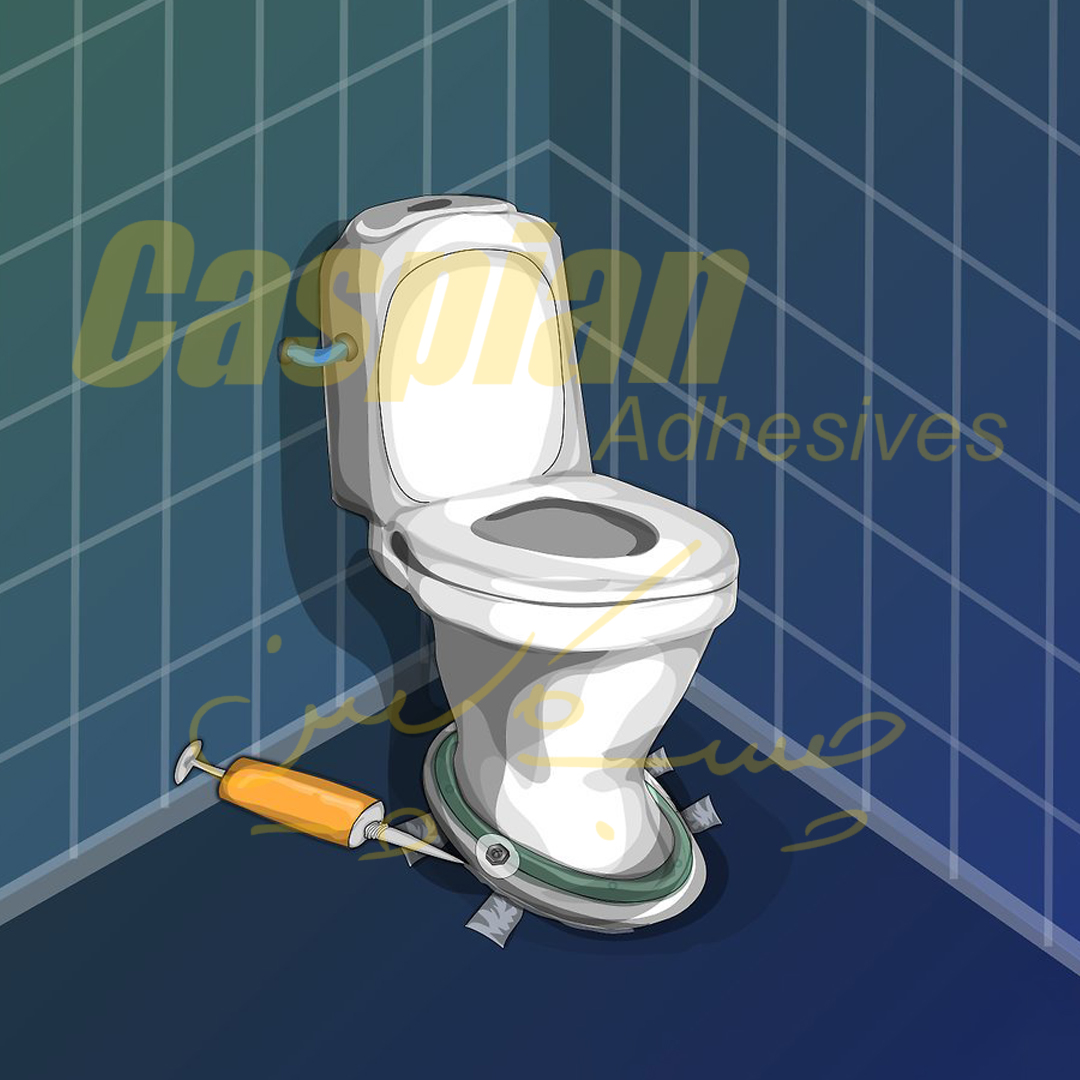
Caulking around a toilet is usually done to hide the gap between the toilet’s base and the floor for cosmetic reasons or to prevent odor leakage. It’s not done to prevent water from leaking around the base; doing this would cause more harm than good. It’s a relatively simple home improvement project, but will require the right preparation beforehand. Caulk does require some cleanup and tooling after application to ensure an even, subtle seal.


Preparing the Surface for Caulking

Remove any old caulk

If your toilet already has a caulk seal around the base, you’ll want to remove it rather than apply caulk directly over it. You can find dedicated caulk removal tools in home improvement stores. Run this tool along the joint between the toilet and the floor to scrape out any old caulk.

  • If you don’t have a caulk removal tool handy, you can also use a utility or razor knife to loosen the caulk at one end. Aim to pull it up in 1 long strip.
  • You can make an old caulking job easier to clean up by applying commercial caulk removers before scraping. If you do, make sure to check the product’s label to prevent any possible damage to your floors or toilet.


Clean the base of the toilet
After clearing the joint of any caulk, you’ll want to get the area as clean as possible. Scoop out any debris, such as paint chips, dirt or rust. Use a general purpose bathroom cleaner and a rag to clean in and around the joint. The cleaner you can get the area, the better of a seal you’ll be able to apply. After cleaning, you can wipe the area with rubbing alcohol to disinfect it.

  • Press a tissue around the base of the toilet to check for moisture. If you find a leak, remove the toilet and replace the wax ring before continuing.
  • If any water or other liquid gets in the joint, do your best to dry it. If you can’t quite reach it, make sure to allow enough time for it to dry properly. Overnight should be sufficient. Caulking over liquid will trap it, which can cause damage to your flooring.
  • Ensure the toilet is even and tight to the floor. If it moves, tighten the bolts or use a shim to straighten it out. Don’t use the caulk to secure the toilet to the floor if it’s loose or uneven.


Apply masking tape to the floor
Not only will this help you get a straighter, smoother seal, but it will prevent any caulk from getting on your floors. Put masking tape on either side of the joint, one following the toilet’s base and the other along the floor. If you’re particularly worried about your caulking abilities, you can use a second strip on either side to double the width of masking tape and protect more of your floors.

  • Since most toilets have a round base, you’ll probably have to use several strips of tape to properly follow the curve. Tear up pieces a few inches long, and apply them to the floor, following the curve of the toilet’s base.
  • Alternatively, you can also buy masking tape that comes curved and is more flexible than typical tape. This will save you some time in taping up your floor.


Squeezing out the Caulk

Choose 100% silicone caulk

Caulk usually comes in a tube and 100% silicone caulk is best for use on a toilet since it’s more resistant to water than other types of caulk, such as acrylic. Silicone caulk is typically a bit more expensive than other types, but that extra money will save you the problems that come with an improper seal.

  • It’s important to match the color of your caulk to your bathroom. White usually fits most styles, but you’ll still want to give this some thought.


Insert the caulk tube into a caulk gun
Cut the tip off the caulk tube and puncture the end with the metal rod attached to the gun. While the tube holds the sealant, the gun is what allows you to deliver it. The main part of the gun is the plastic body, which holds the tube. The plunger is a metal pole with a flat end that runs the length of the body.

  • At the back of the body, you’ll find a metal release, usually shaped like a trigger. Push this forward and you’ll be able to pull back the plunger. You can then insert the caulk tube and push the plunger into the back of the tube.


Pull the caulk gun along the joint between the toilet and floor. Pull on the trigger and keep the caulk gun at a 45-degree angle. Keep your pressure on the trigger consistent and the movement of the caulk gun slow and smooth to ensure a better seal.

  • Use the hand not holding the gun to press the tip of the caulk tube against the joint to ensure that the caulk is pushed into the joint.
  • Pushing the caulk rather than pulling it along will make it more difficult to create a consistent seal.
  • You may want to have a folded up piece of cardboard available nearby to lay the caulk gun onto if you need to stop for any reason. This will prevent caulk from dribbling onto your floors.
  • If you’re having trouble getting your caulk gun behind the toilet, try using caulk in a squeeze tube, which should allow you more flexibility.


Cleaning and Tooling the Sealant

Use your finger to scoop off excess caulk
Run your finger along the caulk seal. This will push caulk deeper into the joint, sealing it more fully. You’ll also be scooping off any extra caulk, resulting in a cleaner joint. You can dip your finger in water or rubbing alcohol if you’re worried about the caulk sticking to your finger.

  • You can discard any caulk buildup directly in the garbage. If you placed a piece of cardboard down to hold your caulk gun, you can simply collect the caulk there for disposal later.
  • If you’re worried about dirtying your hands or irritating your skin, you should wear gloves for this step.
  • You can also buy dedicated caulk finishing tools to clean up your seal, however this isn’t strictly necessary.


Peel off the tape
If you used masking tape, it should peel off quite easily. Pull the tape at a 45-degree angle away from you. If you got caulk on the tape, be careful as you peel it to avoid spilling the sealant on your floors. Masking tape usually shouldn’t leave any sticky residue, but if it does, you can use a product like Goo Gone to get rid of it.


Use a damp rag or sponge to clean up around the joint

You don’t need to apply any cleaning solution to the sponge; you’re relying on its absorbency to clean up any spilled caulk. Pass a damp rag or sponge lightly around the base of the toilet, picking up any caulk around the joint. Make as many passes as you need to clean up the joint, rinsing the sponge between passes.


source: https://www.wikihow.com/Caulk-Around-a-Toilet

Whether you are protecting your bathroom tiles or sealing a window, silicone sealant is the material to use. Though it is super versatile and can be used on a variety of surfaces, this type of sealant will not last forever. When your sealant starts to loosen, crack, or fall off, you’ll need to scrape it out carefully with a utility knife or razor blade.


Removing Silicone Sealant from Bathroom Tiles

Clean the shower or bathtub. Remove any personal items and other shower accessories from the bathtub and place them somewhere out of the way. Wash the tiled area with the bathroom tile cleaner.

  • Find a cleaner that will get rid of soap scum without leaving a residue.
  • You can also use a mild dish detergent and hot water to clean the tiles.


Select the first caulk seam to remove. Use the utility knife or razor to make an incision on one side of the caulk seam. Hold the knife so it is near the wall at the base of the silicone and slide the knife down the full length of the seam.

  • Slice slowly and be careful not to cut into the wall.
  • Don’t cut all the way through the seam. Your goal is just to loosen the edge of the seam. Make a shallow cut by using only the tip of the knife.
  • Repeat the previous step on the other side of the same seam. Slide the knife along the length of the seam close to where the silicone touches the tile, but again without slicing into the wall.


Hold one end of the loose silicone sealant. Peel the caulk up and away from the tile. This will remove the silicone that was filling the joint, along with the part you can see. If you encounter any resistance from the sealant, use the putty knife to push it along.


Remove the remaining sealant in the joint. Use the utility knife or putty knife to dig out any leftover pieces of silicone carefully. Position the knife at an angle to the tile and take your time to avoid scratching or damaging the tile.

  • Repeat the steps for any other seams that you want to remove. Take your time and continue to work carefully.


Scrub the tile to remove any residue. Wet the scouring pad with acetone and wipe it over the bathroom tiles. It may take a little elbow grease to get rid of tougher residue.

  • If you don’t have acetone, you can use rubbing alcohol or mineral spirits instead.
  • Use a mixture of a ⅓ cup of bleach and 1 gallon of water to kill any mold or mildew. Wait until it dries completely before adding new sealant.


Taking Sealant Off Glass

Use the razor to begin scraping the sealant off the glass surface. Position the blade of the razor where the caulk meets the glass. Apply pressure to the razor and begin scraping off the caulk.

  • Be careful when using the razor, so you don’t scratch the glass or cut yourself.


Apply heat with a hot air gun if the silicone does not come off easily with the razor. Set the hot air gun to a high heat setting and point the nozzle at the trouble area. After a few moments, test the area with the scraper to see if it has softened enough for you to continue. Scrape until the majority of the sealant is gone.

  • If you don’t have a hot air gun, a hair dryer on the highest setting will work just as well.


Remove any leftover sealant with the rubbing alcohol and sponge. Dip the sponge in the rubbing alcohol or mineral spirits and gently wipe the glass.

  • If there are still large bits of caulk, try applying heat again and go back to scrapping.
  • After all the sealant is removed, dip a cloth in rubbing alcohol to get rid of any cloudiness on the glass.


Removing Caulk from Wood

Remove loose pieces by hand. If you’re removing the sealant because it is old, there is a good chance there will be unattached bits that are falling away from the wood. Pull off any pieces that can easily be removed by hand.


Use a hot air blower to warm up the remaining sealant. This will soften the caulk and make it easier to remove. Don’t overheat the area too much as this can damage the finish on the wood.

  • You can use a hair dryer instead of a hot air blower to soften the sealant.


Scrape off the rest of the sealant with the razor blade. Position the blade at a low angle, so it doesn’t damage the wood surface. The sealant will come off in large pieces. Use your hands or the tweezers to completely remove the chunks.


Remove the remaining residue with a silicone caulk remover. Start by reading the directions on the caulk remover bottle. Then, apply the remover to the area you just scraped and wipe it off with a damp cloth.

  • Don’t use too much moisture as this can also damage the wood.
  • Before you begin, test the silicone sealant remove on a small section of the wood to ensure it will not damage or discolor it.


Tidy up the surface of the wood with a wood cleaner. This keeps the wood clean and free from harm. A clean surface is essential for applying primer, paint, stain, or varnish.


Source: https://www.wikihow.com/Remove-Silicone-Sealant

Cured silicone is a notoriously difficult substance to remove from any surface. To get it off, you often have to resort to scraping and pulling, and the procedure can be painstaking. While you can find industrial silicone remover products, they’re not safe for home use. Instead, you can use a number of safer options, some of which you may already have.

Silicone Caulk Removal

Silicone caulk lasts for many years, but it does wear out, and when it does, you need to remove it before you can apply fresh caulk. Anyone who has ever done this knows that some household solvents soften silicone caulk, but none dissolves it. A common removal strategy is to soften the caulk with a generous amount of a softening agent and then cut it off with a knife or pull it off with pliers. After the bulk is gone, you typically use the same solvent in combination with a scouring pad to clean up the residue.

Softening Solvents

One item you may have on hand that helps soften silicone is mineral spirits, which is suitable to get silicone off of hard surfaces like tile, marble or concrete. For removing it from plastic or painted surfaces, however, you should use isopropyl alcohol, which won’t harm the surface. Regular alcohol you may have for home use may not be strong enough to do the job. Instead, try an industrial-grade isopropyl alcohol with 99 percent purity.

Other silicone solvent options include toluene and xylene. Always consider the material you’re cleaning when choosing a solvent to make sure they’re compatible. Test the solvent you choose on a hidden spot before you use it on a larger scale to make sure it doesn’t cause any damage. It’s also important to read the product instructions, follow all instructions and warnings, and allow for proper ventilation.

Silicone caulk has an odor that resembles vinegar because, like vinegar, it contains acetic acid. Consequently, white vinegar is another solvent you can use to soften it. It may not work as well as mineral spirits or alcohol, but it poses little danger to the substrate to which the caulk adheres. Rubbing a tabletop exposed to silicone wax with vinegar may safely remove some of the silicone.

Cutting Out the Bulk

Solvents such as vinegar or mineral spirits, and even stronger ones like lacquer thinner, swell cured silicone caulk. This loosens its adhesion to the substrate and makes the caulk easier to cut with a knife.

To remove stubborn caulk, you can either apply the solvent repeatedly or soak a rag and place the rag on the caulk. Once it softens, cutting as closely to the substrate as possible with a sharp knife while you pull the bead is the most efficient way to remove the bulk. Once that’s gone, a thin residue usually remains behind.

Removing Residue

The residue that remains after you’ve cut out the bulk of a bead of caulk can still prevent new caulk from adhering and must be removed. Rubbing it with sandpaper or an abrasive pad isn’t a good strategy because the caulk tends to form small balls that stick to each other and to the paper or pad. The best strategy is to soak the residue with more mineral spirits, alcohol or vinegar to further soften it and then scrape it with a pull scraper or sharp knife. Continue working on the residue using this strategy until it’s removed completely.

source: https://www.hunker.com/12623575/what-solvent-will-clean-silicone

How can you remove silicone caulk without the use of a chemical caulk remover?

This was the question on my mind since the caulk between our kitchen countertops and tile backsplash had more separations than Liz Taylor.

The last thing you want is to ruin an expensive countertop just to remove $5 worth of silicone caulk.

Here’s my solution: use a hair dryer and straight razor.

This idea couldn’t have worked any better and that’s why I’m sharing it with you.

Here are the supplies you need:

  • Hair dryer (for real, just a normal hair dryer)
  • Razor Scraper
  • Cleaning gloves
  • Clorox bleach
  • Cleaning bucket
  • Homax Caulk Tool
  • Bowl to collect the old caulk
  • These Amazon links help support HRT…Gracias

The only thing that’s missing is a hairspray bottle and flat-iron (queue commercial for Paul Mitchell).

You’ll discover this project is somewhat cathartic and way better than removing grout.

This post is super short, so don’t even bother with the popcorn or Junior Mints to view my video.

Let’s get started!

Remove silicone caulk with your hair dryer

Here’s the disclaimer for this post, if your silicone caulk is sandwiched between two pieces of plastic (for example an acrylic tub and shower insert) be SUPER careful not to ruin them. By ruin I mean melt them like laffy taffy.

The Revlon hair dryer I used reached a maximum temperature of roughly 212F. Yes, I’m a geek and measured the heat output with a thermometer (which by the way, for anyone here in the states, provided temperature readouts in Celsius. In case you’re wondering the conversion to Fahrenheit is 9/5C +32)

I sincerely doubt this temperature will ruin a plastic tub or shower but be very careful nonetheless.

Since the silicone caulk in this example was between our backsplash tile and countertop I wasn’t too worried about high heat damaging anything.

For this project it’s best to use the lowest effective dose of heat.  By this I mean you should try the lowest setting on the hair dryer that will help remove the silicone caulk.

Ultimately I had to use the Hot and High settings.


Heat up 8-10 inches of silicone caulk for 30-40 seconds then use a razor blade to slice through it.


Make sure to remove all of the caulk because the new silicone won’t adhere properly to gunkafied surfaces (gunkafied isn’t a word but you get my drift, leftover silicone caulk is a no no).

There are other tools you can use to remove silicone caulk.

One of them is the Homax plastic caulk removal tool. This is a nice tool for beginner DIYers because it has an angled tip to remove silicone caulk from corners. It also has a flat surface that can scrape caulk without scratching tile, bathtubs, or shower surrounds.


You can buy this tool at Home Depot.


How to Remove Moldy Silicone Caulk Residue

If your caulk was moldy and you’re concerned about spores being left behind you can do the following:

  • Pre-wash the previously caulked surface with warm water
  • Add 3/4 cup of Clorox bleach to 1 gallon of warm water
  • Use a sponge to wash the suspected moldy surface with the Clorox solution
  • Let the Clorox stand on the surface for 5 minutes
  • Rinse with warm water and let the area air dry

Yes, the title to this post said “without Chemicals” but that’s if you only need to remove silicone caulk.

Mold is an entirely different issue and warrants something like Clorox bleach. In case the fumes bother you please use a respirator like this one by Mine Safety Appliances.


If you already have a hair dryer and straight razor blade this project will cost you nothing but your time & some patience.


source: https://www.homerepairtutor.com/easily-remove-silicone-caulk/

Getting stickers off of plastic seems like it should be much easier than it is. You can simply try to pull the sticker off, but it may stay partially intact or leave residue. This is because many leading manufacturers use high-strength adhesives to keep labels on plastic. Whether you can’t remove a sticker or want to clean up the residue, there are several ways, from peanut butter to rubbing alcohol that could work for you.


Method 1 of 3:

Using Oils for Removal

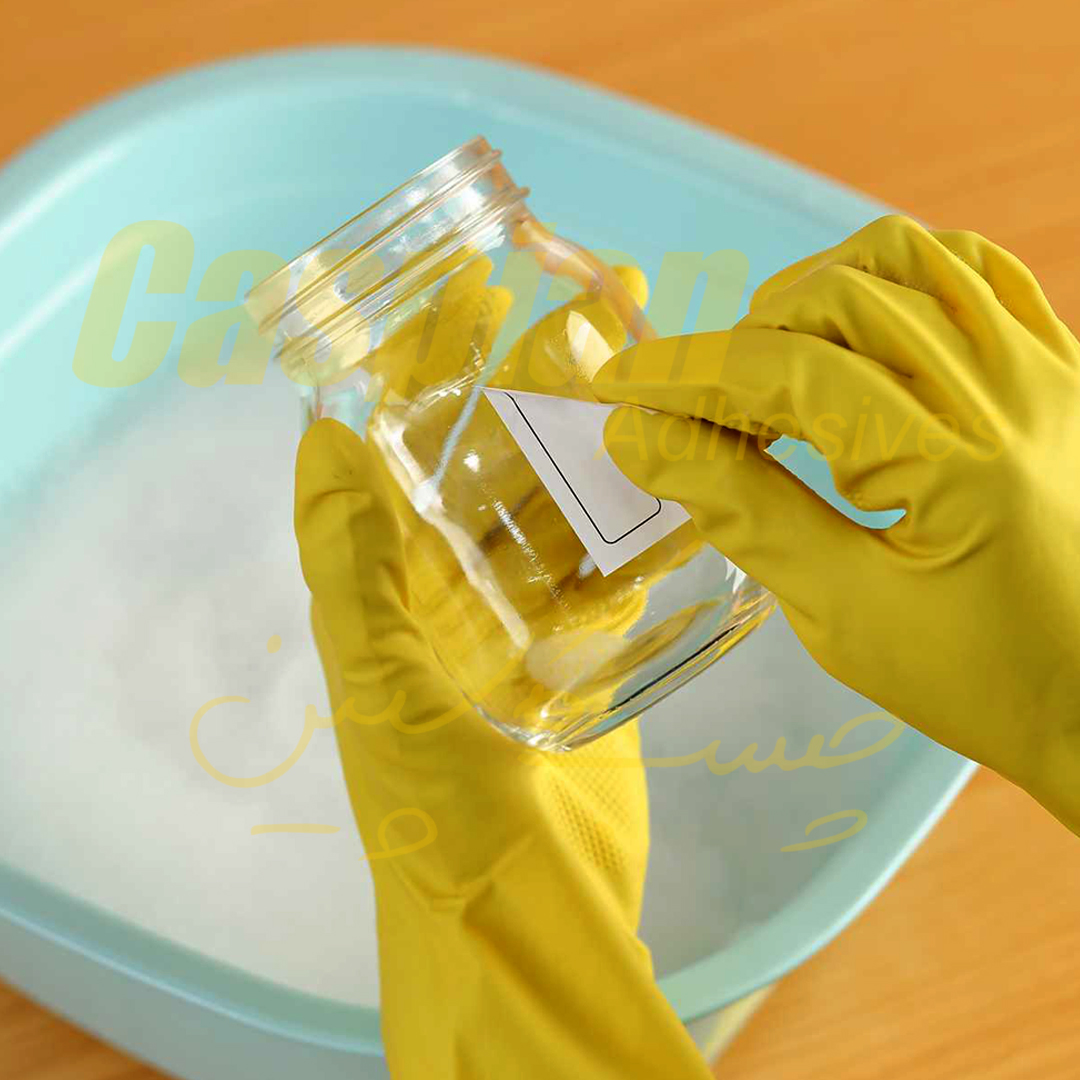
  1. Soak the label in cooking oil. Submerge the plastic in a container of cooking oil for 12 to 24 hours. Canola, vegetable, and other oils will soak into the sticker and loosen the adhesive. This will make it easier to remove later. You can try the method again if it doesn’t work the first time and then gently peel the sticker off with a razor blade.[1]
    • If you are not able to soak the item in oil, then you can also use a cooking oil spray on it.

EXPERT TIP

You can easily remove a sticker from hard plastic using a variety of products, including rubbing alcohol, degreaser, peanut butter, or a mixture of baking soda and olive oil. Apply the product to the plastic, let it soak for a few minutes, then scrub the sticker off using a rag.

  1. Put peanut butter on the sticker residue. The oils in peanut butter will break down many adhesives. Cover the sticker in a thin layer of peanut butter—any type of peanut butter will do. Let it sit for a few minutes before wiping it off with a sponge and warm, soapy water.
  1. Use mayonnaise. The oil in the mayonnaise breaks down the sticky residue leftover from the sticker. Any type of mayonnaise will work for removal. Rub some mayonnaise over the residue. Allow it to sit for fifteen minutes. Then, wipe it off with a dry cloth.
  • You may have to repeat this process if the residue is thick or does not come off the first time.


Method 2 of 3:

Removing with Chemical Solutions

  1. Rub the sticker with lacquer thinner. This is a stronger solution, so you will only need to soak the sticker for 5 to 10 minutes. After you’ve let it soak, scrape up the sticker with a broad, flat item for an adhesive-free clean up. Some specialty products, like Goo Gone, function similarly.
  2. Lift the adhesive with rubbing alcohol. Get a carton of isopropyl alcohol—preferably a 90% solution. Pour a small amount on a rag and begin wiping the adhesive. The adhesive should begin to lift after a minute or so of scrubbing.
  3. Spray a degreaser onto the sticker. You can use a degreaser like WD-40 to wipe away the sticker. First, test the WD-40 on a patch of the plastic to make sure that it won’t harm the sticker if you plan to keep it. Then, spray degreaser on a clean cloth or directly on the sticky label or glue residue. Rub in a circular motion with a towel until the sticker pulls away.
  4. Soak the sticker in nail polish remover. Soak the sticker in a container of nail polish remover. If you don’t have enough nail polish remover, you can apply the remover with a cloth and scrub away the sticker. The sticker will be easier to remove if you give it a few minutes for the remover to react.


Method 3 of 3:

Removing Leftover Adhesive

  1. Use baking soda and warm water or oil to remove goo. Mix together a paste with 3 Tbs of baking soda and a small amount of water or oil (about 2 Tbs). Then use the paste and a cloth to scrub away the adhesive. If it is not coming off, wipe the paste on the adhesive and let it set for several minutes.
  2. Use table salt and a wet wipe. Apply a small amount of table salt to make the adhesive harden. Then, use a disinfectant wet wipe on the sticker until it begins to peel away. You may need to use several wet wipes.
  3. Rub an eraser over the residue. A regular eraser meant to remove pencil is okay to use. Vigorously rub the residue with an eraser until it begins to lift. Continue until most or all of the residue is removed. If there is still some left, you can use a blade to remove it.
  4. Use a blade. It is better to use a plastic blade to remove residue. You can find blades specifically made for removing stickers on Amazon or similar websites. Search for label and sticker removers. Work the tip of the blade under the residue. Then, move the blade back and forth until the residue begins to come off. Continue using the blade until most or all of the residue has been removed.


source: https://www.wikihow.com/Remove-a-Sticker-from-Plastic?amp=1